UI Interaction
Introduction
Graphical user interfaces, like in traditional software, are a key element in Virtual Reality to visualize data and interact with the application.
Data is normally represented using components such as text, images, and video while the different actions are performed by pressing interactive elements like buttons and scroll views.
To provide maximum compatibility with existing workflows and designs, UltimateXR fully supports Unity UI and TextMeshPro. This means that even user interfaces that were designed without VR in mind, can automatically work using UltimateXR without any additional effort.
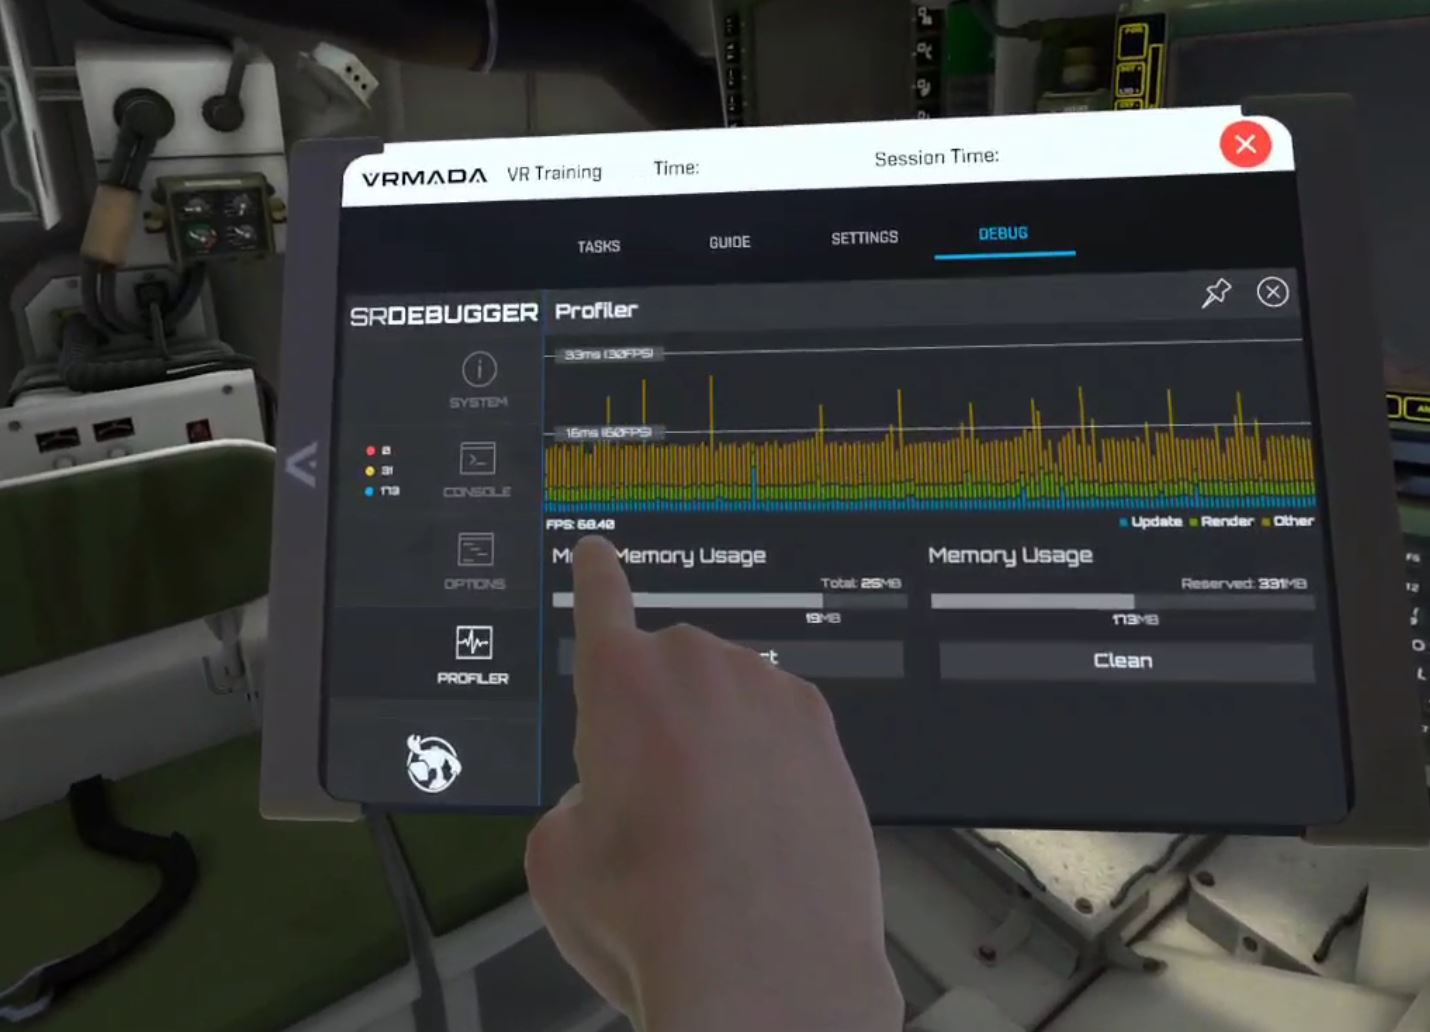
Here is an example of the popular SRDebugger tool, working in VR using UltimateXR:
Interacting with a UI
UltimateXR supports two ways to interact with a user interface:
- Direct touch, using the fingertips that have a UxrFingerTip component.
- From a distance, using a laser pointer on one or both hands, through the UxrLaserPointer component.
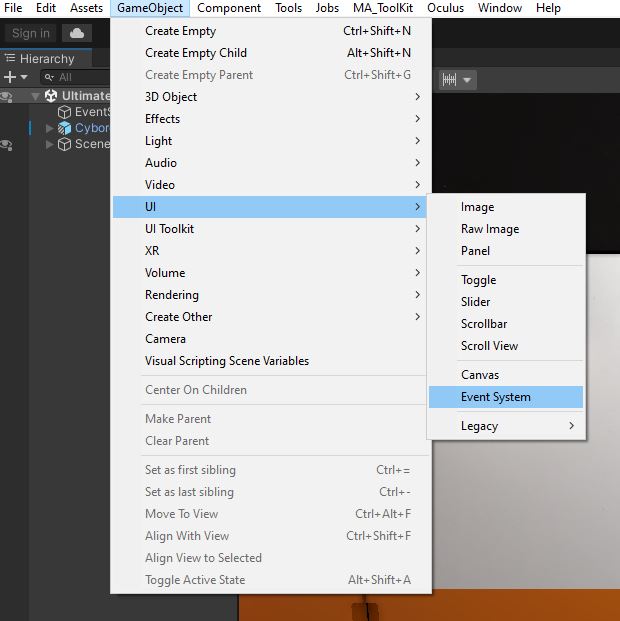
Setting up a UI
The first requirement to be able to use user interfaces is to add a Unity EventSystem GameObject to the scene using the GameObject -> UI -> EventSystem menu:
We then add the UxrPointerInputModule component to the EventSystem GameObject which looks as follows:
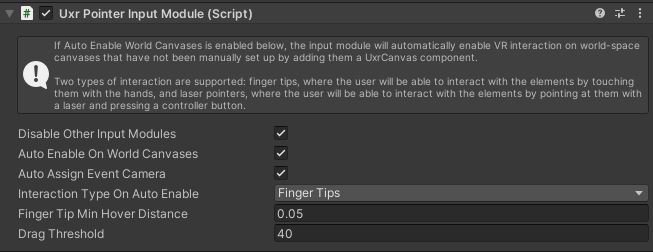
The UxrPointerInputModule is required to enable interaction with canvases in the scene.
The Auto Enable On World Canvases option allows UltimateXR to automatically setup all the canvases in the scene that work in World mode (i.e. in 3D). This means that they will automatically support interaction using the given input type (fingertips or laser pointers).
If for some reason you don’t want UltimateXR to automatically set up pre-existing canvases or you are instantiating a canvas at runtime, you need to set up the canvas manually. This is done by simply adding a UxrCanvas component on the same GameObject that has the Unity Canvas:

A common mistake is to forget adding the UxrCanvas component to prefabs that are instantiated at runtime.
Setting up the avatar
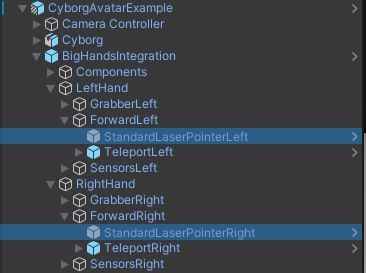
The built-in avatars in UltimateXR already come with fingertips and laser pointers pre-configured. The prefabs have the fingertips enabled and the laser pointers disabled by default. If you want to use laser pointers instead, you can enable them by enabling the GameObjects hanging from the HandsIntegration object as shown below:
Setting up fingertips in a custom avatar
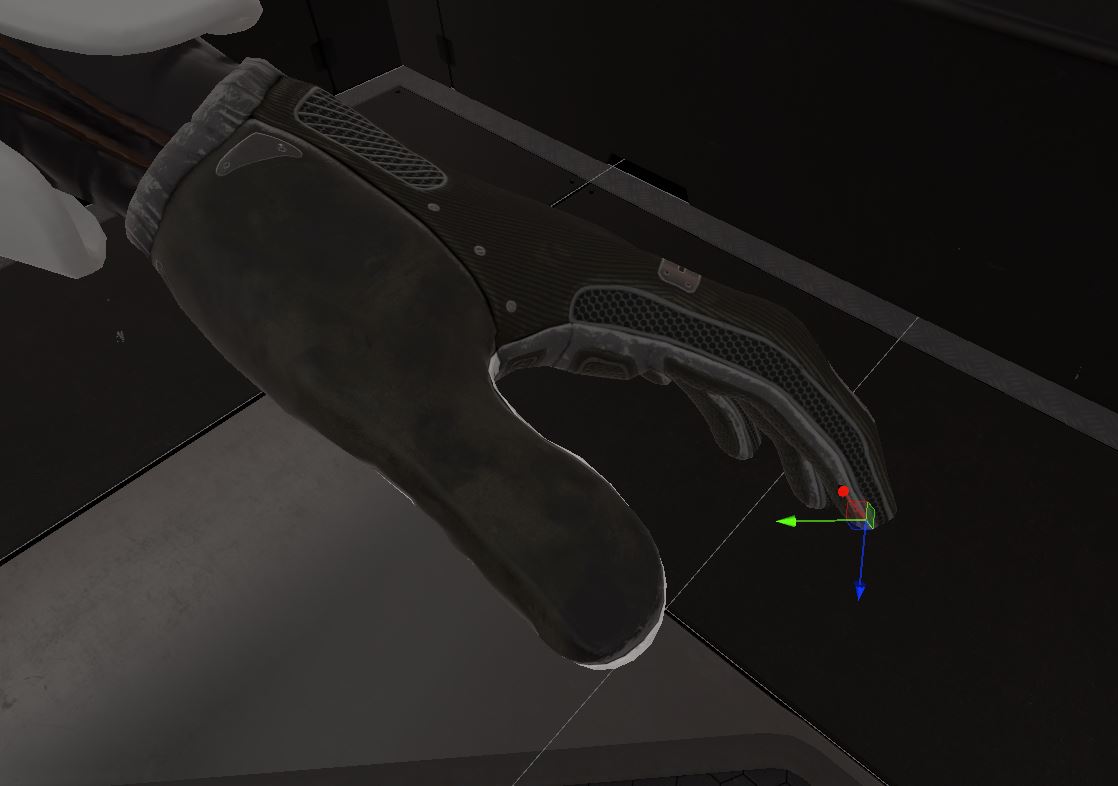
Fingertips are enabled using the UxrFingerTip component and are normally added only to the index finger on each hand, to facilitate touch interaction and avoid undesired pressing. You may use a GameObject hanging from the distal bone of the finger.
An important consideration is to align the forward vector of the GameObject containing the UxrFingerTip component in the direction the pressing is performed. Using a slight downward angle is desired because press actions are normally performed that way. UltimateXR filters out press actions that aren’t performed in a natural angle, so be careful with this step. The right and up vectors do not require to have a specific orientation.
Setting up laser pointers in a custom avatar.
UI laser pointers are enabled using the UxrLaserPointer component, which are normally added to an object hanging from each hand in the avatar.
The UxrLaserPointer shows the following parameters:
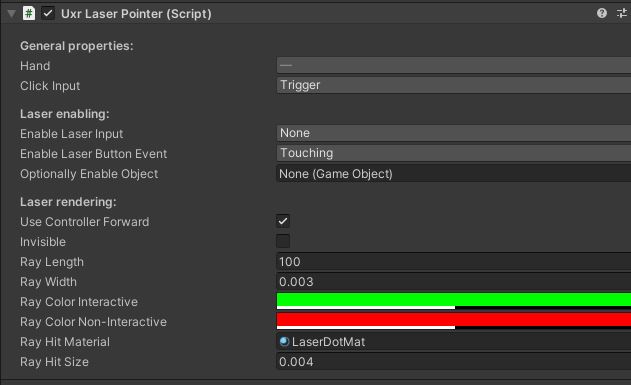
General properties
- Hand: Selects which controller will be used to control the laser.
- Click Input: Which controller button will be used to perform clicks on UI elements.
Laser enabling
- Enable Laser Input: Selects which controller button will be used to enable the laser.
- Enable Laser Button Event: Tells which controller button input event will be needed to enable the laser.
- Optionally Enable Object: Optional additional object that will be enabled/disabled at the same time the laser is enabled or disabled.
Laser rendering
- Use Controller Forward: When the avatar is rendered in controllers mode, will the laser use the controller’s forward vector instead of its own?
- Invisible: Should the laser be invisible? This does not affect any raycasts, they still would be performed but the ray itself will be invisible.
- Ray Length: Laser ray length.
- Ray Width: Laser ray width.
- Ray Color Interactive: Laser color when hovering over interactive UI elements.
- Ray Color Non-Interactive: Laser color when hovering over non-interactive UI elements.
- Ray Hit Material: Material that will be used to render the quad representing the hit with the scenario or UI elements.
- Ray Hit Size: Size of the quad representing the hit with the scenario or UI elements.
The UxrControlInput component
The UxrControlInput is a very useful component that provides additional functionality when added to interactive components such as buttons or even images. Among other things it allows to:
- Specify audios whenever an element was pressed/clicked/released.
- Specify haptic feedback whenever an element was pressed/clicked/released.
- Provide a clean scripting API with properties and events that facilitate the programming of UI interaction.
Audio and haptic feedback can be configured using the UxrControlInput inspector:

Which completely expanded looks like this:
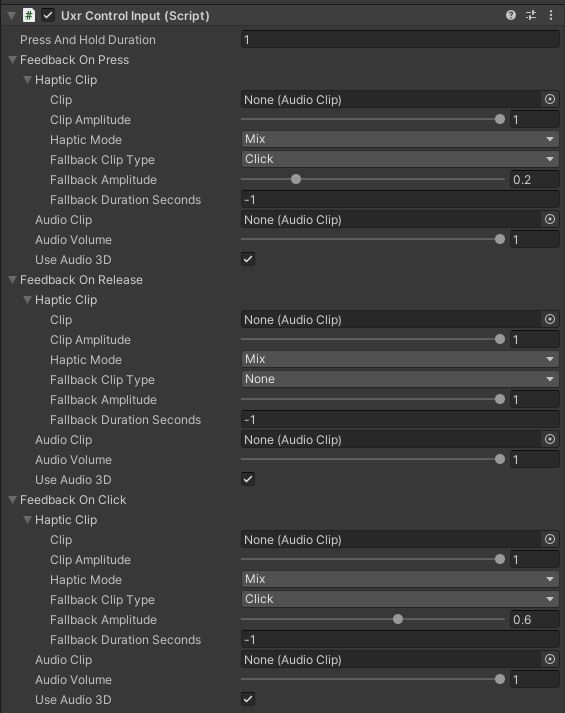
Each press/release/click event allows to specify an optional audio clip that should be played and optional haptic feedback.
The haptic clip supports some interesting features:
- If a Clip (audio file) is specified and the current system supports audio data as haptic feedback, the clip will be transformed to vibration and played through the controllers.
- If a Clip was not specified or the current system doesn’t support audio data as haptic feedback, a Fallback Clip from a pre-defined set of vibrations can be played. You may use a negative value as duration in seconds to specify the default clip duration.
UxrControlInput scripting
Some examples of common UxrControlInput use can be found here.
The full UxrControlInput API can be found here.
Tweening
UltimateXR comes with a full UI tweening animation system. It supports animation and setup both using the inspector and through scripting.
The full set of tweening animation components are:
- UxrCanvasAlphaTween
- UxrColorTween
- UxrImageFillTween
- UxrPositionTween
- UxrRotationTween
- UxrScaleTween
- UxrTextContentTween
They can be added to the different elements in a UI and will perform the given animation when enabled.
For examples of use via scripting go to How do I?
You can also check the full tweening API here.